 OffGridStead
Tiny Cabin Envelopes: Insulation, Air-Sealing & Heat
Why the Building Envelope Matters More in Small Structures
In any building, the envelope — walls, roof, floor, windows, and doors — is the boundary between conditioned interior space and the outside world. In a tiny cabin (100-400 sq ft), the envelope is not just important. It is the dominant factor in whether the structure is livable year-round or a seasonal novelty that freezes you out by November.
The reason is mathematics. Small structures have a punishing surface-area-to-volume ratio compared to conventional homes.
The Surface-Area-to-Volume Problem
Consider a simple rectangular cabin with 8-foot walls:
| Cabin Footprint | Floor Area | Volume (cu ft) | Total Envelope Area (sq ft) | SA:V Ratio |
|---|---|---|---|---|
| 10 x 12 | 120 sq ft | 960 | 592 | 0.617 |
| 10 x 20 | 200 sq ft | 1,600 | 880 | 0.550 |
| 16 x 24 | 384 sq ft | 3,072 | 1,408 | 0.458 |
| 30 x 50 (typical house) | 1,500 sq ft | 12,000 | 4,280 | 0.357 |
A 120 sq ft cabin has a surface-area-to-volume ratio 73% higher than a typical house. That means, per cubic foot of heated space, your cabin has 73% more surface through which heat can escape. Every square foot of envelope that is under-insulated, poorly sealed, or thermally bridged costs you proportionally more than it would in a larger building.
This is why an envelope-first design approach is non-negotiable for tiny cabins. You cannot compensate for a bad envelope with a bigger heater — you will just burn more fuel while remaining uncomfortable due to radiant temperature asymmetry from cold walls and drafty seams.
Wall Assembly Options
The framing system you choose determines your insulation cavity depth, thermal bridging characteristics, build complexity, and cost. Here are the four primary options for tiny cabin construction.
Stick Frame (2x4 or 2x6)
The most common and accessible approach. Standard dimensional lumber at 16” or 24” on center, with cavity insulation between studs.
- Cavity depth: 3.5” (2x4) or 5.5” (2x6)
- Effective wall R-value: R-11 to R-19 (cavity only), R-14 to R-24 with continuous exterior insulation
- Thermal bridging: Significant. Studs at 16” OC reduce effective R-value by 15-25% compared to rated insulation value
- Cost: $3-6/sq ft of wall area (framing + sheathing, no insulation)
- Build complexity: Low. Any builder can do this. Extensive DIY resources available
- Best for: Budget builds, DIY builders, conventional insulation strategies
💡 Pro Tip
Use 2x6 studs at 24" on center ("advanced framing") instead of 2x4 at 16" OC. You get a deeper cavity for insulation, fewer studs means less thermal bridging, and you use less lumber. For a tiny cabin that does not need to meet multi-story structural loads, 24" OC is structurally adequate and thermally superior.
Structural Insulated Panels (SIPs)
Factory-manufactured panels consisting of rigid foam (EPS or polyurethane) bonded between two OSB skins. Panels are typically 4’x8’ or larger.
- Panel thickness: 4.5” to 6.5” (standard), up to 12” for roofs
- Effective wall R-value: R-15 to R-45 depending on thickness and core material
- Thermal bridging: Minimal. Continuous insulation with no stud bays. Spline joints are the weak point
- Cost: $8-14/sq ft of wall area (panel delivered, not installed)
- Build complexity: Medium. Requires a crane or multiple people for panel placement. Electrical chases must be pre-planned or routed in interior furring
- Best for: Cold climates, builders who want a fast dry-in, anyone prioritizing envelope performance
Timber Frame with Exterior Insulation Wrap
A post-and-beam structural skeleton with the insulation applied entirely to the exterior, leaving the timber frame exposed inside.
- Insulation thickness: Determined by exterior rigid foam or SIP curtain wall
- Effective wall R-value: R-20 to R-40+ (depends entirely on the wrap system)
- Thermal bridging: Near zero if detailed correctly. The structure is inside the thermal envelope
- Cost: $12-25/sq ft of wall area (timber frame + exterior insulation system)
- Build complexity: High. Requires timber framing skill or a kit, plus careful detailing of the exterior insulation-to-frame connection
- Best for: Those who want exposed interior wood aesthetics with no compromise on thermal performance
Steel Frame (Light Gauge)
Light-gauge steel studs, sometimes used in tiny homes on trailers due to weight advantages.
- Cavity depth: 3.5” to 5.5” (similar profiles to wood)
- Effective wall R-value: R-5 to R-9 without thermal break (steel conducts heat aggressively), R-15 to R-25 with continuous exterior insulation
- Thermal bridging: Severe. Steel studs are thermal short circuits. A steel 2x4 wall insulated with R-13 batts has an effective whole-wall R-value around R-5-7
- Cost: $5-9/sq ft of wall area
- Build complexity: Medium. Requires metal cutting tools, self-tapping screws
- Best for: Weight-critical builds (THOW), fire-prone areas. Must always include continuous exterior insulation
⚠️ Warning
Never use steel framing without continuous exterior insulation. The thermal bridging through steel studs will cause condensation on the interior face of the sheathing in cold weather, leading to mold and rot within the wall cavity. This is one of the most common failures in steel-framed tiny homes.
Wall Assembly Comparison Table
| Assembly | Effective R-Value | Cost/sq ft (complete wall) | DIY Friendly | Thermal Bridging Risk |
|---|---|---|---|---|
| 2x4 stick, 16” OC | R-11 to R-14 | $6-10 | High | Moderate |
| 2x6 stick, 24” OC | R-19 to R-24 | $8-13 | High | Low-Moderate |
| 2x6 + 1.5” exterior rigid foam | R-26 to R-31 | $11-17 | Medium | Low |
| SIPs 4.5” EPS | R-15 to R-17 | $14-20 | Medium | Very Low |
| SIPs 6.5” polyurethane | R-40 to R-45 | $18-26 | Medium | Very Low |
| Timber frame + exterior wrap | R-20 to R-40 | $20-35 | Low | Very Low |
| Steel frame + 2” exterior foam | R-18 to R-22 | $14-20 | Low | Moderate |
Insulation Deep Dive
Choosing the right insulation material depends on your wall assembly, climate zone, moisture conditions, budget, and whether you are doing the work yourself. Below is a detailed comparison with real cost and performance numbers.
Material Comparison
| Material | R-Value/Inch | Cost per R per sq ft | Vapor Permeability | Air Barrier? | DIY Install? | Fire Rating | Notes |
|---|---|---|---|---|---|---|---|
| Fiberglass batt | 3.0-3.7 | $0.02-0.04 | High (permeable) | No | Yes | Non-combustible | Performance degrades significantly with even small gaps or compression. Must fill cavity perfectly |
| Mineral wool batt (Rockwool) | 3.3-4.2 | $0.04-0.06 | High (permeable) | No | Yes | Non-combustible to 2,150F | Hydrophobic, does not absorb water. Dimensionally stable. Superior to fiberglass in every way except cost |
| Closed-cell spray foam (ccSPF) | 6.0-7.0 | $0.12-0.20 | Very low (Class II vapor retarder at 1.5”+) | Yes | No (requires equipment + licensing) | Combustible, requires thermal barrier | Adds structural rigidity to wall assembly. Best R/inch available. Also functions as air and vapor barrier |
| Open-cell spray foam (ocSPF) | 3.5-3.8 | $0.06-0.10 | High (permeable) | Yes (air barrier) | No | Combustible | Good air sealing but no vapor retarding properties. Can absorb water — do not use below grade |
| Rigid EPS (expanded polystyrene) | 3.8-4.4 | $0.04-0.06 | Semi-permeable | No (joints leak) | Yes | Combustible | Stable R-value across temperatures. Least expensive rigid foam |
| Rigid XPS (extruded polystyrene) | 5.0 | $0.06-0.08 | Low (semi-impermeable) | No (joints leak) | Yes | Combustible | R-value may degrade over time as blowing agents diffuse. Higher environmental impact (HFC blowing agents) |
| Rigid polyisocyanurate (polyiso) | 5.7-6.5 | $0.06-0.10 | Low at thickness | No (joints leak) | Yes | Combustible, foil-faced acts as radiant barrier | R-value drops below rated in cold temperatures (below ~50F, effective R drops to ~4.5-5.0/inch). Perform best as interior-side or warm-side insulation |
| Dense-pack cellulose | 3.2-3.8 | $0.03-0.05 | High (permeable) | Partial (at dense-pack density) | No (requires blowing machine) | Treated for fire resistance (Class I) | Excellent for retrofit. Fills irregular cavities well. Hygroscopic — can buffer moisture but must dry |
ℹ️ Cost Note
"Cost per R per sq ft" means the cost to achieve one R of insulation value across one square foot. To calculate your total insulation cost: multiply this figure by your target R-value, then by your total wall/ceiling/floor area. For example, mineral wool at $0.05/R/sq ft for R-21 walls across 400 sq ft of wall area = $0.05 x 21 x 400 = $420 for wall insulation material.
Climate Zone Targets
The US DOE climate zone map runs from Zone 1 (hot-humid, south Florida) to Zone 7-8 (subarctic, northern Alaska). For tiny cabins, aim above code minimum — the incremental cost of more insulation is small relative to lifetime heating and cooling expense.
| Component | Zone 1-2 (Hot) | Zone 3 (Mixed) | Zone 4 (Cold) | Zone 5 (Colder) | Zone 6-7 (Very Cold) |
|---|---|---|---|---|---|
| Walls | R-13 min, R-19 target | R-19 min, R-21 target | R-21 min, R-28 target | R-25 min, R-33 target | R-30 min, R-40 target |
| Roof/Ceiling | R-30 min, R-38 target | R-38 min, R-49 target | R-49 min, R-60 target | R-49 min, R-60 target | R-60 min, R-80 target |
| Floor | R-13 min, R-19 target | R-19 min, R-25 target | R-30 min, R-38 target | R-30 min, R-38 target | R-38 min, R-49 target |
| Windows (U-factor) | U-0.40 max | U-0.32 max | U-0.28 max | U-0.25 max | U-0.22 max |
Air Sealing Methodology
Insulation slows conductive heat transfer. Air sealing stops convective heat transfer — the movement of heated air through gaps and cracks in the envelope. In a tiny cabin, air leakage typically accounts for 25-40% of total heating energy loss. A systematic sealing approach is essential.
Systematic Room-by-Room Approach
Air sealing works best when you treat it as a distinct construction phase, not something you do incidentally while insulating. Walk every surface of the envelope and seal every penetration, transition, and joint.
Foundation/Floor Plane:
- Sill plate to foundation: continuous bead of acoustical sealant or sill gasket foam under the plate, plus exterior caulk
- Rim joist / band joist: cut rigid foam (XPS or polyiso) to fit tight between joists, then seal all edges with canned spray foam. This is one of the highest-leakage areas in any wood-frame structure
- Plumbing and wiring penetrations through the subfloor: fire-rated caulk or canned foam around every pipe, wire, and duct that passes through the floor plane
- Subfloor panel joints: construction adhesive (applied during assembly) or tape from below
Wall Plane:
- Bottom plate to subfloor: continuous sill gasket + caulk both sides of the plate
- Top plate to ceiling: caulk or foam the double top plate joint. Seal every wire, pipe, and vent that passes through the top plate. This is the single most important air sealing location in the building because warm air rises and pressurizes the top of the envelope
- Sheathing joints: tape all OSB/plywood seams on the exterior with a high-quality sheathing tape (e.g., ZIP System tape, 3M 8067, or Siga Wigluv)
- Electrical boxes: use airtight electrical boxes or apply foam gaskets behind standard boxes. Seal wire penetrations with caulk
- Window and door rough openings: backer rod + low-expansion spray foam (never high-expansion — it can bow frames). Apply a continuous bead, not spot application
Ceiling/Roof Plane:
- Ceiling drywall to top plate: continuous bead of acoustical sealant before drywall installation
- Recessed lights: use only IC-rated airtight fixtures. Standard can lights are massive air leak points. In a tiny cabin, avoid recessed lights entirely if possible
- Ceiling penetrations (vent fans, flue pipes): use pre-manufactured airtight collars rated for the specific penetration type. Flue pipes require fire-rated metal collars with high-temperature sealant
- Attic hatches: weatherstrip with compression gaskets, add rigid foam to the hatch back, and install hook-and-eye latches to compress the gasket
💡 Pro Tip
Use the "pencil test" during framing. Before insulation goes in, on a windy day, hold a stick of incense or a thin pencil-width candle near every joint, penetration, and transition. Air movement will deflect the smoke, showing you exactly where to seal. This low-tech method finds most major leaks.
Air Sealing Materials Reference
| Location | Material | Product Examples | Application Notes |
|---|---|---|---|
| Sill plate to foundation | Sill gasket + sealant | Dow Sill Seal, Tremco acoustical sealant | Gasket under plate, sealant both sides |
| Sheathing seams | Sheathing tape | ZIP tape, 3M 8067, Siga Wigluv | Apply to clean, dry surface above 20F |
| Rough openings | Low-expansion foam | DAP Touch ‘n Foam, Great Stuff Window & Door | Never use “gaps & cracks” formula on windows |
| Rim joist | Cut rigid foam + canned foam | 1.5-2” XPS or polyiso, Great Stuff | Cut 1/4” undersized, foam the perimeter |
| Wire/pipe penetrations | Fire-rated caulk | 3M Fire Barrier CP 25WB+, Hilti FS-ONE | Required by code at fire separations |
| Electrical boxes | Airtight box or gasket | Lessco Air-Tight box, foam gaskets | Seal wire entries with caulk |
| Top plate | Caulk or canned foam | Polyurethane caulk, Great Stuff | Seal before insulation goes in |
| Ceiling drywall joint | Acoustical sealant | Tremco, ChemLink NovaLink | Never dries fully rigid, stays flexible |
Vapor Barriers and Moisture Management
Moisture kills buildings. In a tiny cabin where cooking, breathing, and showering generate significant moisture in a small volume, getting the vapor management strategy right is critical. Get it wrong and you will find mold, rot, and structural failure within a few years.
The Rules of Vapor Drive
Moisture in air (water vapor) moves from warm to cold and from high concentration to low concentration. In winter, vapor drives from the heated interior toward the cold exterior. In summer with air conditioning, it reverses. Your wall assembly must allow drying in at least one direction while preventing bulk moisture accumulation within the cavity.
Vapor Barrier Placement by Climate Zone
| Climate Zone | Interior Vapor Retarder | Exterior Vapor Retarder | Rationale |
|---|---|---|---|
| Zone 1-2 (Hot-Humid) | None (or Class III max) | None | Vapor drive is inward during cooling season. Interior poly will trap moisture. Use permeable assemblies |
| Zone 3 (Mixed) | Class III (latex paint on drywall) | None | Mixed vapor drive direction. Assembly must dry in both directions |
| Zone 4 (Cold) | Class II (kraft-faced batts or variable-perm membrane) | None or vapor-permeable WRB | Predominantly outward drive in winter. Interior retarder slows vapor entry into wall |
| Zone 5+ (Very Cold) | Class I or II (poly sheeting or smart membrane) | None | Strong outward vapor drive. Some codes require 6-mil poly. Smart membranes (Intello, MemBrain) are better — they adjust permeability by humidity |
⚠️ Warning
Never install vapor barriers on both sides of a wall assembly. This creates a "vapor sandwich" where any moisture that enters the cavity (through a fastener penetration, a failed seal, or diffusion during a temperature reversal) cannot escape. The cavity stays wet, and mold colonizes within weeks. In mixed climates (Zones 3-4), use a variable-permeability ("smart") membrane on the interior instead of polyethylene.
What Happens When You Get It Wrong
- Interior poly in a hot-humid climate: Summer vapor drive pushes moisture inward. It condenses on the cool poly surface (cooled by AC). Liquid water pools behind the drywall. Result: mold growth, drywall failure, potential structural damage within 1-3 years
- No vapor management in a cold climate: Interior moisture from cooking, breathing, and bathing passes freely into the wall cavity, hits the cold sheathing, condenses. OSB sheathing rots from the inside out. Result: structural sheathing failure in 3-7 years
- Vapor sandwich (poly both sides): Construction moisture, incidental leaks, or diffusion during temperature swings has no escape path. Trapped moisture supports sustained biological growth. Result: severe mold contamination, often hidden until structural damage is advanced
Window Selection
Windows are the weakest thermal element in any envelope. Even a high-performance window has an R-value of only R-5 to R-8, compared to R-20+ for an insulated wall. In a tiny cabin, window selection and placement have an outsized impact because the window-to-wall ratio is often higher than in a conventional house (people want natural light in small spaces).
Key Performance Metrics
| Metric | What It Measures | Target for Zone 4 | Target for Zone 6+ |
|---|---|---|---|
| U-factor | Rate of heat loss (lower = better) | 0.28 or lower | 0.22 or lower |
| SHGC (Solar Heat Gain Coefficient) | Fraction of solar energy transmitted (0-1) | 0.25-0.40 depending on orientation | 0.30-0.50 (want solar gain in cold climates) |
| VT (Visible Transmittance) | Fraction of visible light transmitted | 0.40+ | 0.40+ |
| Air Leakage | CFM per sq ft at 75 Pa | 0.10 or lower | 0.10 or lower |
Frame Materials
| Frame Type | U-factor Contribution | Durability | Cost | Notes |
|---|---|---|---|---|
| Vinyl | Low (good insulator) | 20-30 years | $ | Most common, good performance-to-cost ratio. Can look cheap |
| Fiberglass | Very low (best insulator) | 40+ years | $$$ | Strongest thermally. Dimensionally stable. Premium option |
| Wood | Low-Medium | 30+ years with maintenance | $$ | Beautiful interior finish. Requires exterior protection (clad or paint) |
| Aluminum | High (terrible insulator) | 40+ years | $$ | Avoid unless thermally broken. Even “thermally broken” aluminum performs worse than vinyl |
Placement Strategy for Passive Solar
In a tiny cabin, window placement can meaningfully reduce heating loads if you follow passive solar principles:
- South-facing (northern hemisphere): Maximize glazing area. Use higher SHGC glass (0.40+) to capture winter solar gain. Size an overhang to shade the glass when the sun is high in summer
- East-facing: Moderate glazing. Morning sun is welcome for warming and light, but hard to shade in summer
- West-facing: Minimize glazing. Afternoon summer sun causes severe overheating in small spaces and is difficult to shade with fixed overhangs due to the low sun angle
- North-facing: Minimize glazing. No direct solar gain. Every square foot is pure heat loss. Use only what is needed for light and egress code
📐 Example
For a 200 sq ft cabin in Zone 4 with the long axis running east-west: put 40-50 sq ft of glazing on the south wall (high SHGC), 10-15 sq ft on the east wall, 5-10 sq ft on the west wall (low SHGC), and 5-10 sq ft on the north wall (low U-factor priority). This gives you roughly 70-85 sq ft of total glazing -- a 12-15% window-to-floor ratio, which provides good daylighting while keeping heat loss manageable.
Heating System Comparison
A well-insulated tiny cabin needs surprisingly little heat. Before choosing a heating system, calculate your actual heat load. Oversizing is the most common mistake in tiny cabin heating — it leads to short-cycling, temperature swings, and wasted fuel or electricity.
BTU Load Calculation
A simplified heat load formula for a tiny cabin:
Heat Load (BTU/hr) = Total Envelope Area (sq ft) x U-value (1/R-value) x Delta-T (indoor temp - outdoor design temp)
For a 200 sq ft cabin (10x20, 8’ walls) in Zone 4 with a design temperature of 5F and a target indoor temperature of 68F:
- Walls (480 sq ft at R-24): 480 x (1/24) x 63 = 1,260 BTU/hr
- Ceiling (200 sq ft at R-49): 200 x (1/49) x 63 = 257 BTU/hr
- Floor (200 sq ft at R-30): 200 x (1/30) x 63 = 420 BTU/hr
- Windows (70 sq ft at R-3.6 / U-0.28): 70 x 0.28 x 63 = 1,235 BTU/hr
- Door (21 sq ft at R-5): 21 x (1/5) x 63 = 265 BTU/hr
- Air infiltration at 3 ACH50 (~0.15 ACH natural): 1,600 cu ft x 0.15 x 0.018 x 63 = 272 BTU/hr
Total: approximately 3,709 BTU/hr at design conditions
Heating System Options
| System | BTU Output Range | Efficiency | Fuel/Energy | Upfront Cost | Annual Operating Cost (Zone 4, 200 sq ft) | Off-Grid Compatible | Notes |
|---|---|---|---|---|---|---|---|
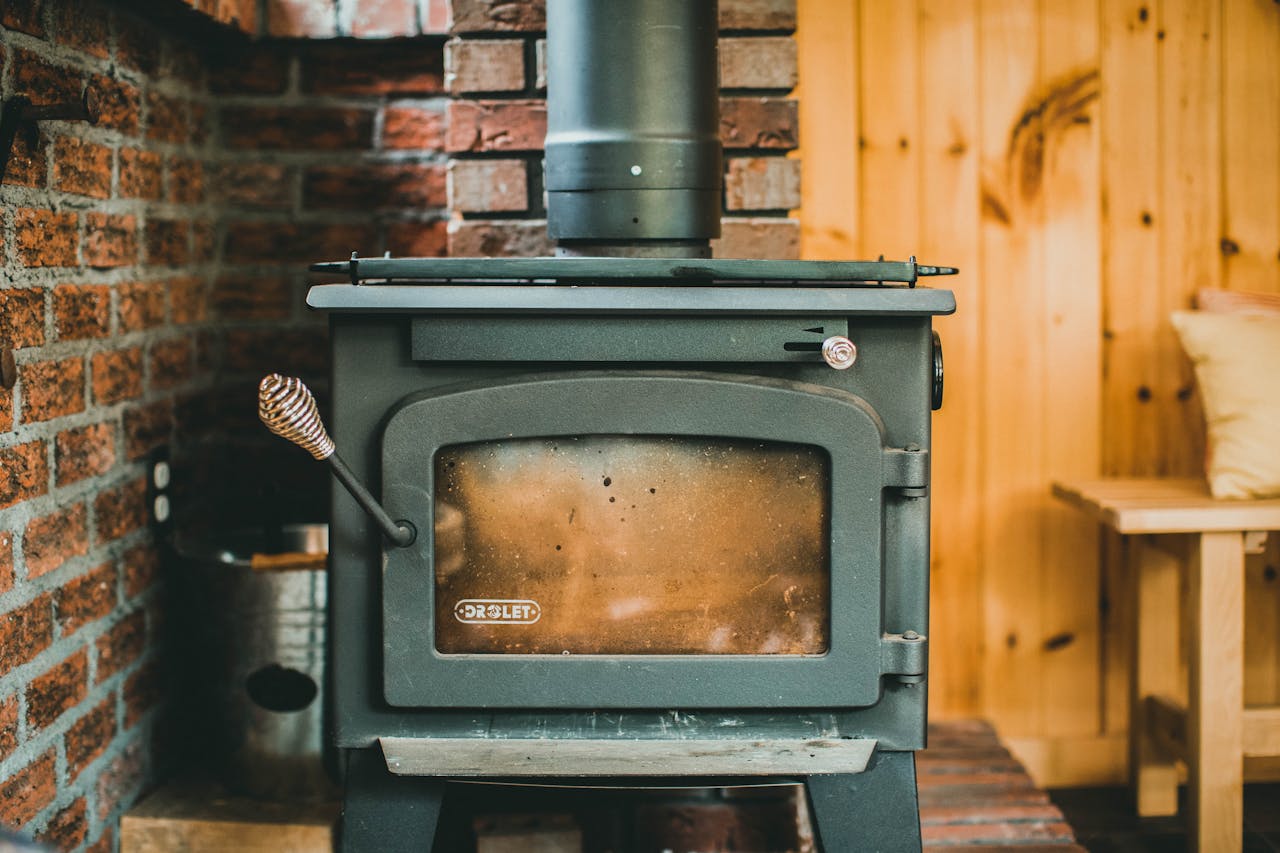
| Mini wood stove (Cubic Mini, Dwarf 3kW) | 6,000-15,000 | 60-75% (EPA-certified) | Cordwood | $400-1,200 | $0-300 (free wood) to $200-400 (purchased) | Yes | Requires Class A chimney ($300-800). Wall clearances consume floor space. Provides radiant + convective heat. Unmatched ambiance. Can overheat small spaces on mild days |
| Propane direct-vent wall heater | 5,000-20,000 | 80-99% (condensing models) | Propane | $300-800 | $300-700 at $2.50/gal | Partial (no electricity needed, but requires propane delivery) | Reliable, simple, no moving parts. Requires combustion air supply and venting. Vent-free models add moisture and combustion byproducts to interior air — avoid in tight envelopes |
| Mini-split heat pump (Mitsubishi, Fujitsu, MrCool) | 6,000-12,000 | 250-400% (COP 2.5-4.0) | Electricity | $1,500-3,500 installed, $800-1,500 DIY (MrCool) | $150-400 at $0.12/kWh | Partial (requires electricity, works with solar) | Most efficient option by far. Provides heating and cooling. Performance degrades below 5F (hyper-heat models work to -13F). Requires outdoor unit placement and line set |
| Electric radiant floor (in-slab or under-floor mat) | Variable (sized to load) | 100% (electric resistance) | Electricity | $6-12/sq ft installed | $400-900 at $0.12/kWh | Partial (requires electricity) | Best thermal comfort of any system (warm feet, even temperature). Slow response time. Expensive to operate compared to heat pump. Best paired with a high-mass slab floor for thermal storage |
| Rocket mass heater | 20,000-40,000 (peak), stored in mass | 80-90% | Cordwood, small branches | $200-600 (mostly DIY, uses recycled materials) | $0-200 | Yes | Burns extremely hot and clean. Stores heat in a thermal mass bench or floor (cob, brick, stone) that radiates for 12-24 hours after a 1-2 hour burn. Requires significant floor space for the mass. Not code-approved in most jurisdictions. Excellent for off-grid cabins where code is not enforced |
ℹ️ Sizing Rule
For a tiny cabin, your heating system should output no more than 2x your calculated heat load at design temperature. A 200 sq ft cabin needing 3,700 BTU/hr should use a heater rated at 5,000-8,000 BTU/hr maximum. The smallest mini wood stoves (Cubic Mini Grizzly at 6,000 BTU output) are still almost double the load for this cabin -- which means you will need to run them at low burn rates with the damper nearly closed, or open a window on milder days.
Cooling Strategies for Hot Climates
In Zones 1-3, summer cooling loads often exceed winter heating loads. A tiny cabin’s high SA:V ratio works in your favor here if you have good shading, but works against you if the cabin is in direct sun.
Passive strategies (implement all of these first):
- Orient the cabin with the long axis east-west to minimize east/west sun exposure
- Install a 24-36” roof overhang on the south side, sized to shade windows at summer solar noon
- Use light-colored roofing (cool metal roof with reflective coating). A white or light metal roof can reduce attic temperatures by 30-50F compared to dark asphalt shingles
- Ventilate the attic or roof cavity — do not allow hot air to stagnate above the ceiling insulation
- Plant deciduous trees on the south and west sides (long-term strategy)
- Install operable windows for cross-ventilation. Position inlet windows low on the windward side and outlet windows high on the leeward side
Active cooling (when passive is not enough):
- Mini-split heat pump: the same unit that heats in winter cools in summer. A 6,000 BTU cooling unit handles most tiny cabins
- Window AC unit: $150-300, works well, but loud and aesthetically poor. Acceptable for seasonal cabins
- Ceiling fan: not cooling by itself, but extends the comfortable temperature range by 4-6F through air movement. Use a 36-42” fan in a tiny cabin
Ventilation Design
A tight envelope requires mechanical ventilation. Without it, moisture from breathing, cooking, and bathing accumulates rapidly in a small volume. Two adults in a 200 sq ft cabin produce roughly 1-2 pints of moisture per hour just from breathing and skin evaporation. Add cooking and showering, and you can easily generate 3-5 pints per hour. In a tight cabin, this moisture has nowhere to go without mechanical ventilation.
HRV vs. ERV
| Feature | HRV (Heat Recovery Ventilator) | ERV (Energy Recovery Ventilator) |
|---|---|---|
| Recovers | Sensible heat only (temperature) | Sensible heat + latent heat (temperature + moisture) |
| Heat recovery efficiency | 70-90% | 60-85% (sensible), 50-70% (latent) |
| Best climate | Cold, dry climates (Zones 4-7) | Hot-humid or mixed climates (Zones 1-3) |
| Winter behavior | Exhausts interior moisture, which helps prevent condensation | Retains some interior moisture, which helps prevent over-drying |
| Summer behavior | Does not manage humidity | Reduces incoming humidity from outdoor air |
| Cost | $400-1,200 for small units | $500-1,400 for small units |
💡 Pro Tip
For a tiny cabin, look at the Panasonic Intelli-Balance 100 or the Lunos e2 decentralized system. The Panasonic is a single-point ERV rated at 50-100 CFM that fits in a 6" wall cavity. The Lunos system uses paired through-wall units that alternate supply and exhaust -- no ductwork required. Both are well-suited to the space constraints of a tiny cabin.
Sizing
ASHRAE 62.2 requires 7.5 CFM per person plus 3 CFM per 100 sq ft of floor area. For a 200 sq ft cabin with 2 occupants:
- 7.5 x 2 = 15 CFM (people)
- 3 x 2 = 6 CFM (area)
- Total: 21 CFM continuous ventilation
Most small HRV/ERV units are rated at 30-50 CFM minimum, which exceeds this requirement. Run on the lowest setting for continuous ventilation and boost to full speed during cooking or showering.
Ductwork in Tiny Spaces
In a tiny cabin, complex duct systems are impractical and unnecessary. Options:
- Single-point unit (no ducts): Mount the HRV/ERV in a wall or ceiling with direct exterior penetrations. Simple, minimal space, works well for open floor plans
- Short-run ducted: If the cabin has a bathroom separated by a wall, run a short (under 10 ft) insulated flex duct from the unit to the bathroom for exhaust pickup. Supply air comes from the main unit location
- Decentralized (Lunos-style): Two through-wall units in different rooms alternate push-pull cycles. No ducts at all. Each unit is about 6” diameter and mounts in the wall thickness
Blower Door Testing
A blower door test is the only way to verify your air sealing work. It costs $150-400 when hired out, or you can rent a blower door for $200-400/day. For a tiny cabin, this is one of the highest-value investments you can make.
How It Works
A calibrated fan is mounted in an exterior door frame. The fan depressurizes the cabin to -50 pascals (about 0.2” water column). The fan’s airflow rate at this pressure, divided by the cabin’s volume, gives you the air changes per hour at 50 pascals (ACH50).
Target Values
| Standard | ACH50 | What It Means |
|---|---|---|
| Typical new construction | 5-7 | Leaky. Noticeable drafts near outlets and windows |
| Energy Star | 3-5 | Decent. Mechanical ventilation recommended |
| Good tiny cabin target | 2-3 | Tight. Mechanical ventilation required |
| Passive House | 0.6 | Extremely tight. Requires meticulous detailing |
When to Test
Test before you close up interior walls. If the test reveals problems, you want access to the framing to fix them. The ideal sequence:
- Complete framing, sheathing, and rough-in (electrical, plumbing)
- Complete air sealing (all penetrations, transitions, joints)
- Run blower door test (with smoke pencil to find remaining leaks)
- Fix any leaks found
- Re-test if needed
- Install insulation
- Close interior walls
Common Mistakes That Lead to Failure
These are the errors that cause mold, rot, structural damage, and uncomfortable living conditions in tiny cabins. Every one of them is avoidable.
-
Skipping the air barrier and relying on insulation alone. Fiberglass batts in a leaky wall provide a fraction of their rated R-value. Air moves through the batt, carrying heat with it. Insulation and air sealing are two different systems that must both be present
-
Poly vapor barrier in a mixed or hot climate. Interior polyethylene in Zones 1-3 traps moisture during the cooling season. Use smart membranes or vapor-permeable assemblies instead
-
No ventilation in a tight cabin. A tight envelope without mechanical ventilation creates a humidity trap. Interior moisture levels climb above 60% RH, condensation forms on cold surfaces, and mold follows within weeks
-
Oversized heating. A 25,000 BTU wood stove in a 200 sq ft cabin is dangerous. It will drive the interior temperature above 90F in minutes, force you to open windows (negating the purpose of your envelope), and short-cycle constantly. Size to load
-
Insulating without addressing thermal bridging. A 2x6 wall with R-19 batts but no exterior insulation has an effective whole-wall R-value of roughly R-15 due to the thermal bridge through the studs. The studs are 8% of the wall area but account for 20%+ of the heat loss through the wall
-
No drainage plane behind cladding. Bulk water intrusion through the cladding is the number one source of moisture in walls. Every wall needs a water-resistive barrier (WRB) and a drainage gap (rainscreen or drainable housewrap) between the cladding and the sheathing
-
Uninsulated or poorly sealed floor. The floor is in contact with cold ground or open air (pier foundation). An uninsulated floor at 45F in winter creates a constant cold radiant surface that makes the cabin feel 5-10F colder than the air temperature
-
Ignoring the roof. Heat rises. The ceiling/roof plane is the highest-priority insulation location. An R-19 wall with an R-30 ceiling is backwards. The ceiling should always have the highest R-value in the assembly
Complete Example Build Spec: 200 sq ft Cabin, Climate Zone 4
This is a complete materials and cost specification for the building envelope of a 200 sq ft (10’ x 20’) cabin with 8’ walls, pier foundation, and a simple shed roof. Climate Zone 4, design temperature 5F, target indoor temperature 68F.
Foundation and Floor
| Component | Specification | Material Cost |
|---|---|---|
| Piers | 6x6 PT posts on concrete footings, 24” above grade | $200-350 |
| Floor framing | 2x10 joists at 16” OC, double rim joist | $350-500 |
| Subfloor | 3/4” T&G AdvanTech (moisture resistant) | $300-400 |
| Floor insulation | R-30 mineral wool batts (Rockwool ComfortBatt), friction-fit between joists | $280-360 |
| Floor air sealing | Cut rigid foam in rim joist bays, canned foam perimeter, sill gasket | $80-120 |
| Underside protection | Tyvek or similar stapled to bottom of joists to keep insulation in place and block wind-washing | $40-60 |
| Floor subtotal | $1,250-1,790 |
Walls
| Component | Specification | Material Cost |
|---|---|---|
| Framing | 2x6 studs at 24” OC, single top plate with Simpson connectors, PT bottom plate | $400-550 |
| Sheathing | 1/2” ZIP System (integrated WRB) | $350-450 |
| Sheathing tape | ZIP tape on all seams and penetrations | $40-60 |
| Exterior insulation | 1.5” polyiso rigid foam, foil-faced, long-screwed through to studs | $250-350 |
| Rainscreen | 3/4” furring strips over rigid foam, creating drainage and ventilation gap | $60-90 |
| Cladding | Board-and-batten or LP SmartSide panels | $400-700 |
| Cavity insulation | R-23 mineral wool batts (Rockwool ComfortBatt for 2x6) | $350-450 |
| Interior vapor retarder | CertainTeed MemBrain smart vapor retarder | $60-80 |
| Interior finish | 1/2” drywall or 1x6 T&G pine | $200-500 |
| Wall subtotal | $2,110-3,230 |
Effective wall R-value: R-30 to R-33 (R-23 cavity + R-9 continuous exterior, minimal thermal bridging with 24” OC)
Ceiling/Roof
| Component | Specification | Material Cost |
|---|---|---|
| Roof framing | 2x12 rafters at 24” OC (shed roof, 2/12 pitch) | $350-500 |
| Roof sheathing | 1/2” ZIP System | $250-320 |
| Roofing | Standing seam metal, light color (Galvalume or painted) | $500-900 |
| Ceiling insulation | R-49: R-38 mineral wool batts (2 layers of R-23 compressed or R-38 high-density) + 2” polyiso rigid foam (R-11) above sheathing under roofing | $400-550 |
| Ceiling air sealing | Acoustical sealant at drywall-to-framing joints, airtight electrical boxes, sealed penetrations | $40-60 |
| Interior finish | 1/2” drywall or 1x6 T&G pine | $180-350 |
| Ceiling/roof subtotal | $1,720-2,680 |
Windows and Door
| Component | Specification | Material Cost |
|---|---|---|
| Windows | 6 windows, fiberglass frame, triple-pane, U-0.25, argon-filled. South: 3x (2’x4’) with SHGC 0.40. East: 1x (2’x3’) SHGC 0.28. West: 1x (1.5’x3’) SHGC 0.25. North: 1x (2’x3’) SHGC 0.25 | $1,800-3,000 |
| Exterior door | Fiberglass, insulated, U-0.20 or lower, weatherstripped | $300-600 |
| Window/door installation | Low-expansion foam, backer rod, interior sealant, exterior flashing tape | $40-70 |
| Windows/door subtotal | $2,140-3,670 |
Mechanical (Envelope-Related)
| Component | Specification | Material Cost |
|---|---|---|
| Heating | Cubic Mini Grizzly wood stove (6,000 BTU) + Class A chimney kit with thimble and cap | $700-1,100 |
| Backup heating | MrCool DIY 12k mini-split (provides heating to -5F and summer cooling) | $800-1,400 |
| Ventilation | Panasonic Intelli-Balance 100 ERV or Lunos e2 pair | $500-900 |
| Mechanical subtotal | $2,000-3,400 |
Summary
| Category | Cost Range |
|---|---|
| Foundation and floor | $1,250-1,790 |
| Walls | $2,110-3,230 |
| Ceiling and roof | $1,720-2,680 |
| Windows and door | $2,140-3,670 |
| Mechanical (envelope-related) | $2,000-3,400 |
| Total envelope materials | $9,220-14,770 |
ℹ️ Labor Note
These costs are materials only. If you hire all labor, expect to add 50-100% to the total. If you DIY the insulation, air sealing, and interior finish but hire out framing and roofing, expect to add 25-40%. A realistic all-in envelope cost for this cabin is $12,000-22,000 depending on labor approach and material choices.
Key Takeaways
- Tiny cabins lose heat faster per unit volume than larger buildings due to their high surface-area-to-volume ratio. This makes envelope quality the single most important design decision.
- Air sealing and insulation are separate systems that must both be executed well. Insulation without air sealing delivers a fraction of its rated performance.
- Size your heating to your actual calculated load. A 200 sq ft cabin in Zone 4 with a good envelope needs only 3,500-5,500 BTU/hr -- far less than the smallest conventional heating equipment.
- Vapor management must match your climate zone. Interior poly in hot-humid climates causes condensation and mold. Variable-permeability membranes are safer in mixed climates.
- Always include mechanical ventilation in a tight envelope. An ERV or HRV sized at 20-30 CFM handles a typical tiny cabin while recovering most of the energy from exhaust air.
- Test with a blower door before closing walls. A $200-400 test can reveal problems that would cost thousands to fix after the interior is finished.
- The complete envelope for a 200 sq ft cabin in Zone 4 costs $9,000-15,000 in materials for a high-performance assembly (R-30 walls, R-49 ceiling, R-30 floor, triple-pane windows, 3 ACH50 or better).
Recommended Gear
Products we trust in this category. Affiliate links support the site at no extra cost to you.
LEIFIDE Composting Toilet Sawdust (5.5 lbs)
All-natural composting sawdust for indoor and outdoor compost toilets. Eliminates odor without chemicals.
View on AmazonAffiliate link
Dry Flush Portable Toilet
Waterless, odorless, self-contained rechargeable portable toilet for RVs, vans, boats, tiny houses, and off-grid living.
View on AmazonAffiliate link
Laveo Dry Flush Toilet
Waterless, portable, self-contained dry flush toilet. No plumbing, no water, no chemicals — just seal and dispose. Great for tiny homes, vans, boats, and off-grid cabins.
View on AmazonAffiliate link